Email Ins and Outs
There are four ways ManagePro Integrates with Outlook:
1.
|
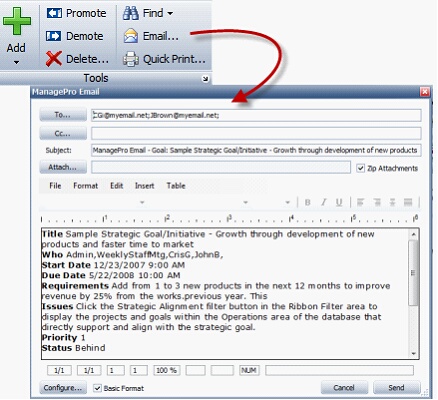
ManagePro integrates with MS Outlook such that once the email preferences are established, the emailing of MPro records, progress updates, todos, and events can be sent directly from MPro as an email message to a recipient using the right-click menu option or clicking the email icon found on the tools section of the Ribbon Control. This is very useful when needing to delegate Todos, or notifying team members of new project records or progress updates
|
Example: Emailing record from MPro
2.
|
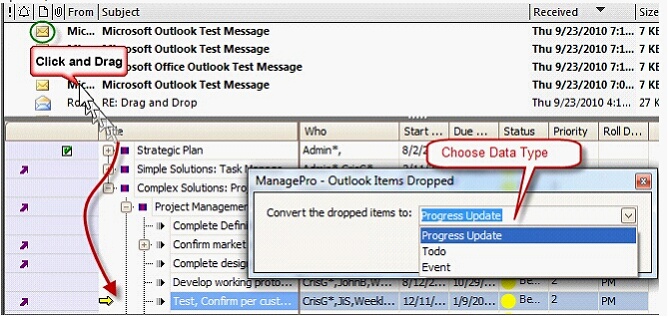
The Drag and Drop from MS Outlook to MPro feature allow email messages from your MS Outlook in-box to be converted, transferred and associated directly with MPro records as progress updates, todos, and events.
|
3.
|
Import MS Outlook email features allow email messages from your MS Outlook in-box to be converted, transferred and associated directly with MPro records as progress updates, todos, and events.
|

4.
|
Using the MProOutlook Add-in, a tool provided by PST which allows email records to be dragged directly into records in the database which are displayed in the Outlook Add-in when connected to a MPro Standard, Plus, Smart or Lite
|
To send email directly from MPro follow the steps below:
1.
|
Select a record from the Main workspace, or open a record and create and send a progress update or todo
|
2.
|
Right-click the record and choose Email from the menu > the Email Editor will launch (may take a couple minutes)
|
3.
|
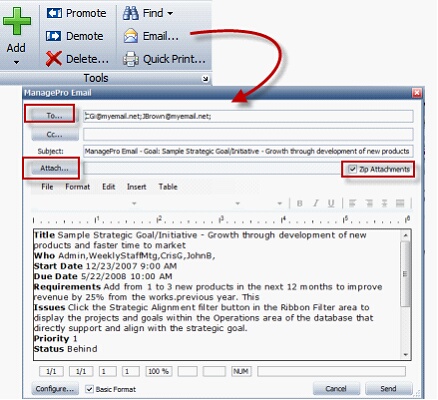
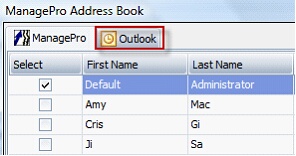
The “To” field will auto-populate with people in record “Who” field. You can also click the “To” field to modify the recipients by clicking the ManagePro tab to add additional MPro Users or remove them or click the Outlook Tab to add Outlook contacts.
|
Note: Outlook contacts must exist in MS Outlook before they are displayed in the Outlook list
4.
|
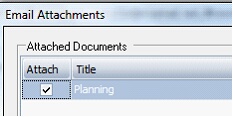
Next, are attachments? If there is an attachment on the MPro record being emailed, click the “Attach” button in the email editor. Doing so allows you to select the attachments or alternatively, you can click the “browse” button (not shown in the screen capture below) to browse to the location of your document.
|
5.
|
Once the document is attached, you can decide to send as a zip file or uncheck and the document will be sent unzipped. Larger sized documents are ideal to send as a zip file. At this point you can click the “send” button to send or proceed to the steps below to customize the fields included in your MPro record email message
|

6.
|
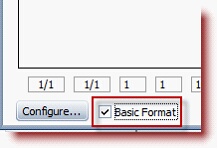
At the bottom of the email editor you can check or uncheck the Basic Format of the text. Basic Format acts like a toggle and when checked provides more of a plain text format without a table and when Basic Format is unchecked, a table format is displayed.
|
7.
|
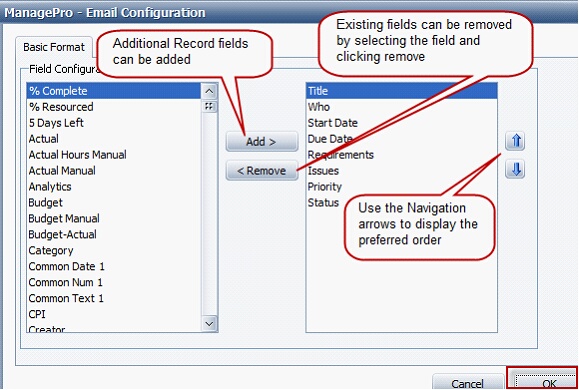
In addition to the Basic Format option, the Configure button enables customization of fields displayed in the email editor which can be removed or customize by adding new fields.
|
8.
|
Once the customization is complete, click OK and customizations are then displayed in the email
|
9.
|
You can format, edit text and insert graphics using the Formatting Toolbar
|

|