Duration depicts the length of days between the Start Date and Due Date for a given goal and/or sub-goal. The duration can provide you with information eg, metrics to be used when setting up repeatable goals and/or sub-goals.

You can view the duration field on the Gantt Chart view as shown above or in the record details. You can also roll-up the duration from the sub-goals underneath the parent goal by unchecking the start and due manual over-rides. Please see Start and Due Dates for more information and Rollup and Over-rides
Working with the Duration Field along with Start and Due Dates
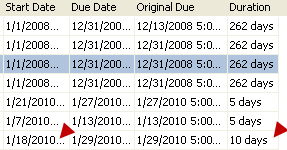
When in the record details, you can set the "start date" by simply entering the "duration" and "due date". This is useful when you don't always know when the task or project is going to start but have an estimate of how long it will take and when it should be completed. In the example, below we navigated to the Gantt Chart, double-clicked a record to open the "Details" view, and set the "duration" to 10 days and "due date" to 1/29/2010, after saving the record, you'll notice the "start date" auto-calculates to 1/18/2010 (10 days) backward which gives you the start date.
 >>>>>> >>>>>>
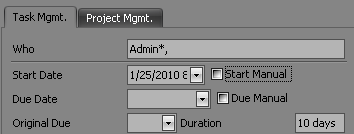
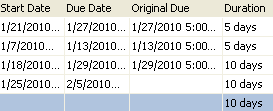
Alternatively, you can set the "due date" by entering the "start date", and "duration". doing so auto-populates the "due date". In the example below, we navigated to the Gantt Chart, double-clicked on a record to open the Record Details and set the "duration" at 10 days and the "start date" at 1/25/2010. After saving the record, the due date auto-calculates with 2/5/2010 (10 days) forward which gives you the due date.
 >>>>>> >>>>>>
Finally, let's say you don't know when the project or task will start, or finish but you can estimate the duration, in this case, simply enter the duration and save the record. Once you know either the start or due date, you can enter it.

Note: When when working with start, due and durations and changes are not immediately displayed, simply click the Refresh Button found on the Ribbon Control to write the changes to the database.

|