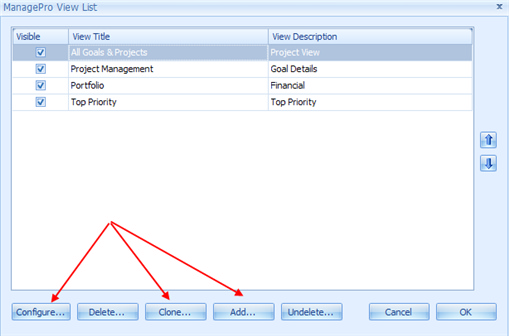
Before you start, review the existing views and determine why you need a sub-view. For example, your organization includes a Finance Department and rather than working with the All Goals View, they prefer to have a sub-set of the data filtered by records unique to Finance. This means the Finance Department will either enter or import goals and only work with that sub-set of data on a day-to-day basis but still have access to all other views. Another benefit in reviewing the existing Views before creating a sub-view, is you may find that one of the existing Views meets your needs and in this case you can Clone that view and modify it rather than Adding a New View.
Configuring a View is achieved by:
•
|
Right-clicking for example in the Outline View
|
•
|
Selecting View Configuration
|

Ways to Configure Views
1.
|
Configure the Existing View : Means to tailor it to meet your business needs
|
2.
|
Clone: Means you want to use the structure and most of the fields available on the view but you are going to rename the view
|
3.
|
Add: Add a new view that is very different than the existing views
|
Configure an Existing View, click Configure
•
|
Apply filters if applicable
|
Clone an Existing View, select the View that most matches the View you want to create, click Clone
•
|
Modify the view by adding and or removing fields
|
•
|
Apply filters if applicable
|
Creating a New View
3.
|
Add Fields to the View
|
|