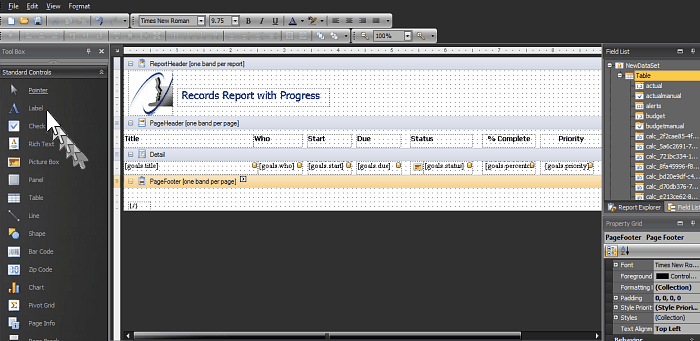
To create the headings we drag and drop Label controls from the Tool Box,
size and position them with the mouse and set the Text and Font properties via the Properties Grid.

A useful shortcut here is to create one label and setup it’s Font and color etc then use Copy & Paste to duplicate it and then just edit the Text property of each copy, this avoids having to setup Font and Color for each label.
Setup the Detail Band
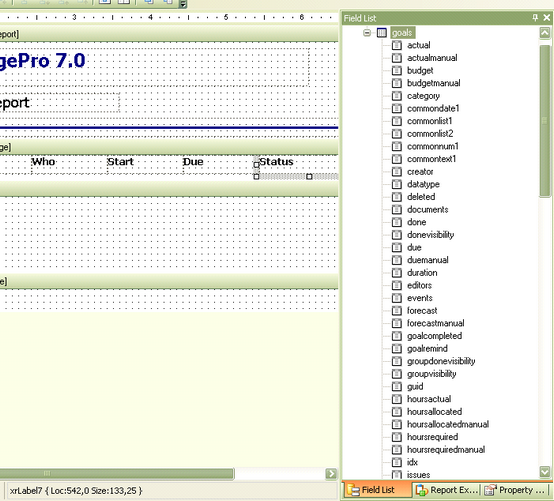
The next step is to setup the Detail band, this is the band that displays for each record in the report. To set this up we use the Field List pane, this will contain a list of available fields for the particular data type you are using, in this example it is Goals.
Remember, on your system the Field List may not be a tab at the bottom as shown below, if you can’t find it, look in the View --> Windows menu of the Report Designer top menu.

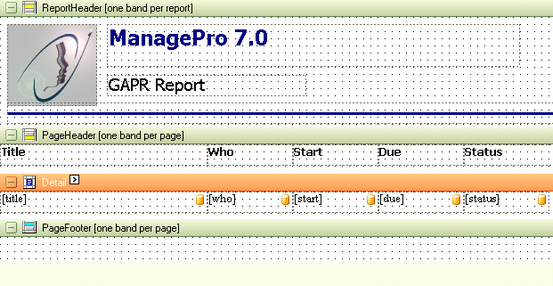
Drag & Drop each field onto the Detail band from the Field List, fields are Label controls with pre-defined database links (note the little database icons displayed in each).
I have also reduced the height of the Detail band, the height determines the line spacing.

|