Hiding the Time displayed along with the Date on Todos and Events is used when you are not sure when they are due. This requires customization and is a function of the Administrator.
Note: The steps below are applicable for Todos and Events
1.
|
Open the User Data/List View
|
3.
|
Open an existing Todo or create a new one
|
4.
|
Right-click in an empty space to access Customize Layout feature
|
5.
|
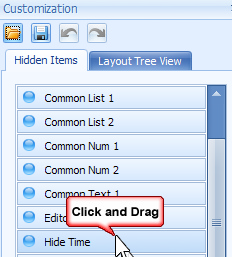
From the Customize window, scroll until you see the field named Hide Time
|
6.
|
Click and Drag the this field onto the Todo Details Window
|
7.
|
click Save on the Customize window
|
8.
|
Close the Customize window by clicking X on the Title bar
|
9.
|
Hide time Field check box will be displayed on the Details window.
|
By following the steps above, you can click the Hide time field on Todo items where no time should be displayed along with the date field
You can only hide the time per record and is not a display option at this time meaning you can not uncheck or check Hide Time for all Todo items.
Further, when you Check hide time, the Todos in your calendar will be positioned at the very top and once you drag the todo item to a time slot on your calendar it automatically unchecks the Hide Time, meaning that the time will then be displayed with the date when you go back to the User Data/List View.


User Data View: 1st record Hide Time is checked
2nd Record Hide Time is not Checked

Calendar View

|