How to set up Custom tabs within the Details View
Sometimes the details view can get very cluttered, covering all the possible fields different groups of users would like to review in that area. One solution is to group various fields under tabs within the Details area. Here’s how to create a tab view.
1.
|
First right click and select Customize Layout while your cursor is pointed outside of a field area from within the Details view.

|
2.
|
Then select the fields within the Details view that you would like to group within a tab, using control left mouse click.
|

3.
|
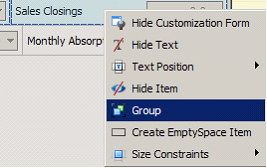
Then right click and choose the “Group” option.
|
Note: Sometimes the Group option is only available if fields on the same line are chosen.
If you wish to add more, you will need to drag them into the newly formed tab field, see below.
4.
|
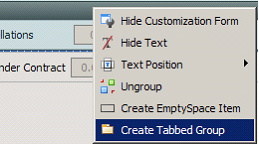
Right click again while pointing the cursor at the banner at the top of the newly highlighted group and select
|
“Create Tabbed Group”.

5.
|
Drag additional fields into the newly tabbed area as needed.
|
6.
|
To create a name for the new tab, go back to the Customize View window, select the Layout Tree tab,
|
find the name of the field you wish to change. Highlight, then right click and select Rename.
Type in the new name and then click “Enter” to save.
|