A Pick list is a Field Type which contains a list of one or more items which a user chooses a single item. They display as drop-down lists in ManagePro. You may have values that reside in other programs that can be imported into ManagePro that would otherwise require manual input.
Scenario
Let's say that you want to import State or Region Values so they can be associated with the records in ManagePro which would make it possible for you to Search the database, or create filters by only those records that are in specific sate or region, here's how.
Before you begin: Create and Prepare your CSV File
Importing data from CSV fields in the Terminology Editor is achieved by selecting
File>Preferences>Terminology Editor which is an Administrator function.
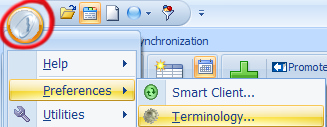
From the Main Workspace View
1.
|
Select the Data Type "the data type" refers to where in ManagePro, Goal, Todos, Events, Progress Updates, or Resources/People and Meetings you would like to the pick list to be available.
|
In this example we will use the Goal Data Type
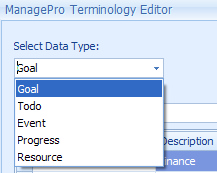
2.
|
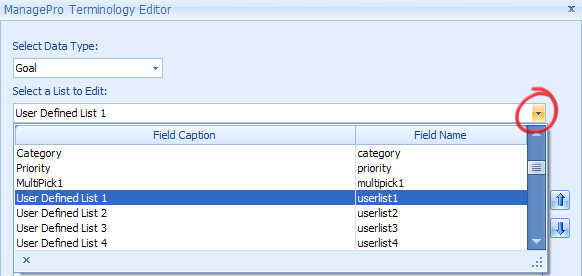
Select one of the User-defined list from the Select a List to Edit drop-down. Make a note of the User defined Number list used so that later you can rename the field caption.
|

4.
|
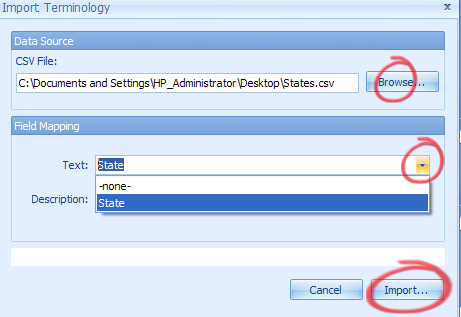
Browse to navigate to yourfile.csv
|
6.
|
Click the Text Field under Field Mapping and make your selection. Your CSV column name will be available for selection after you Browse to and locate your file.
|
The States are now available as Pick list items in the terminology Editor
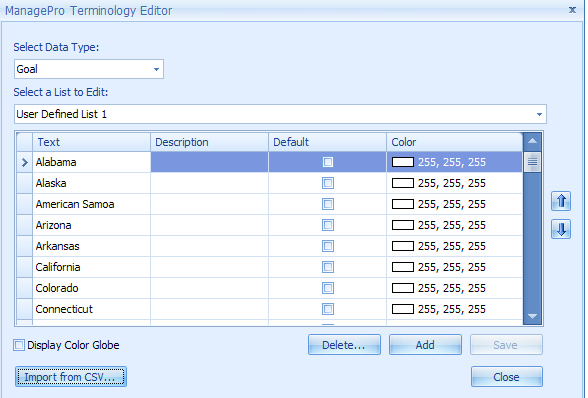
Now Let's rename the User Defined List 1 to State and it the Main Workspace View
1.
|
Click the Program File Button|Preferences|Customize Fields
|
2.
|
Select the User Defined List 1 and rename it to State
|
3.
|
Click OK, ManagePro will restart to refresh the database
|

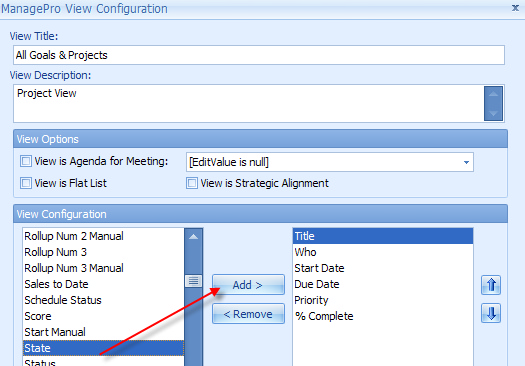
Configuring the View with "State"
1.
|
Right-click in the Main Workspace View where you want the "State" visible as a column
|
2.
|
Select State from the left side of the screen, then click add to move it to the Right
|
4.
|
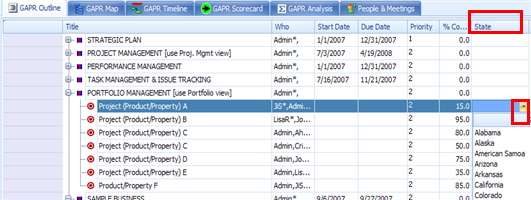
The State Column is now configured on the View
|
5.
|
Highlight the record, then click the drop down in the right-hand corner of the State field and make your selection
|
Note: You may need to size the column width of the State column in order to access the drop-down or you can just directly type in the state field to access the pick list.
|